Many years ago, I wrote a little batch file to find and delete Scheduled Tasks added by an adware variant called LOP. With the introduction of Task Scheduler 2.0 in Windows Vista, that batch became useless and unnecessary. But that doesn’t mean adware, and other malware, has forgotten about using Tasks.
What are Scheduled Tasks?
The Windows Task Scheduler is like an alarm clock that you can set, to start a procedure under specified circumstances.
For example, you can set them to start at a certain time, or repeat at a set interval, or you can set them to start at a certain occasion, most commonly when the computer boots up. Scheduled Tasks are the containers, that hold the information about what has to happen and when.
Since the afore-mentioned introduction of Task Scheduler 2.0 the Scheduled Tasks have the format of xml files and the .job extension.
What hasn’t changed, is the extensive use of Tasks by Adware and other Potentially Unwanted Programs. Since the Task Scheduler can be used to trigger an event every few minutes, this has become a favorite method to deliver advertisements.
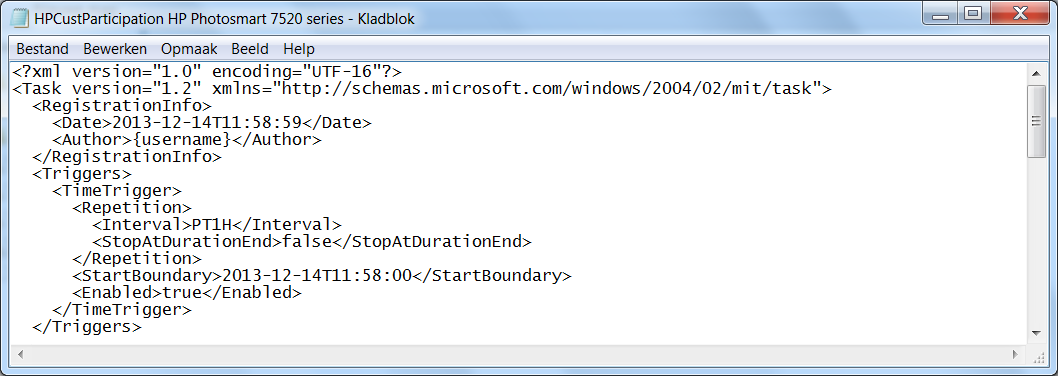
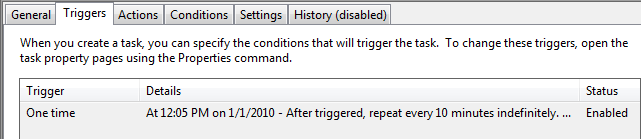
Like this one, the adware dlclient that triggers every 10 minutes.
Thankfully Malwarebytes Anti-Malware is fully capable of removing the unwanted jobs from your system. If, for some reason you want to do it manually, here’s how:
How to open the Task Scheduler
Windows XP and Windows 7
To open Scheduled Tasks, click Start, click All Programs, point to Accessories, point to System Tools, and then click Scheduled Tasks.
Windows 8 and Windows 10
Use the Search option to search for “Schedule” and choose “Schedule Task” to open the Task Scheduler.
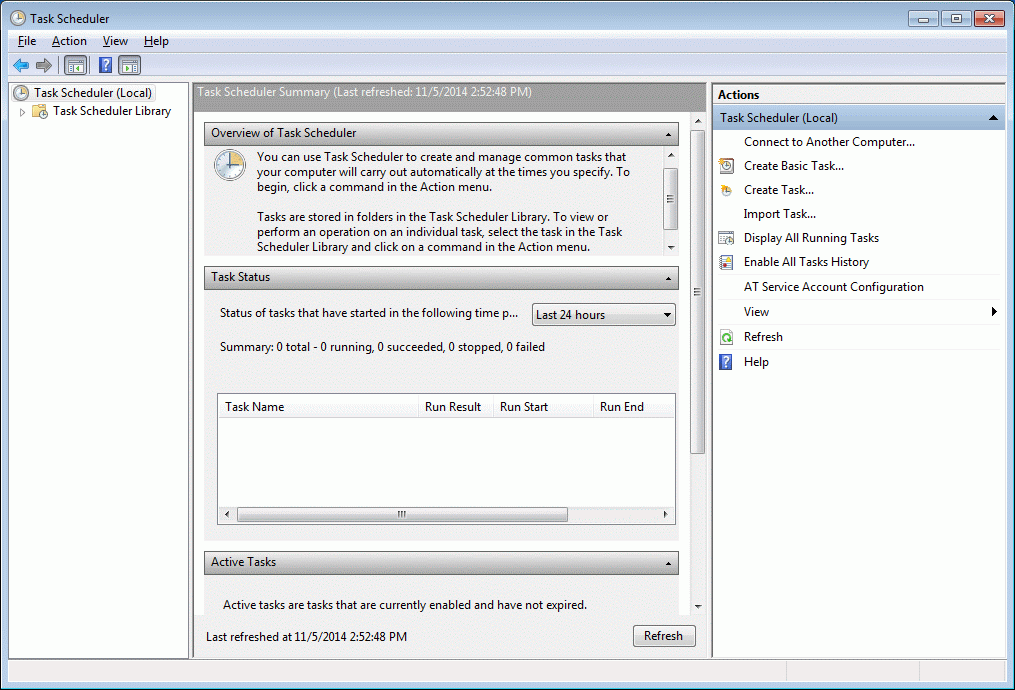
Review the Scheduled Tasks
Select the “Task Scheduler Library” to see a list of your Scheduled Tasks. You can select any single task, to see the properties of that task in the lower pane.
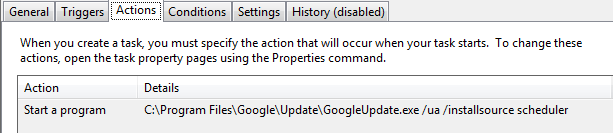
Which file will be run when the Scheduled Task is triggered, can be seen under the “Actions” tab.
Delete a Scheduled Task
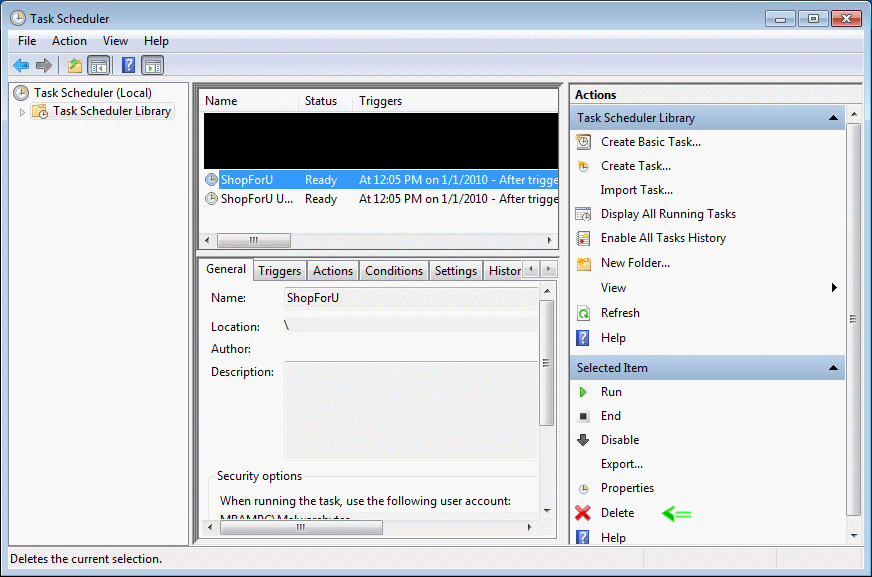
If you have found a task that you wish to remove, you can select the task and click on “Delete” under “Actions” > “Selected Item”
There will be a prompt asking “Do you want to delete this task?”
Click “Yes” if you are sure the task should be deleted.
Task Scheduler and UAC
One of the reasons, why PUPs and Malware like using Task Scheduler, is because it is an effective way to bypass the UAC (User Account Control) prompts. As we can easily demonstrate.
Create a Task to run a program without UAC prompts
In the Task Scheduler window on the right hand side, click “Create Task” to open the “Create Task window”. On the “General” tab check the “Run with highest privileges” checkbox.
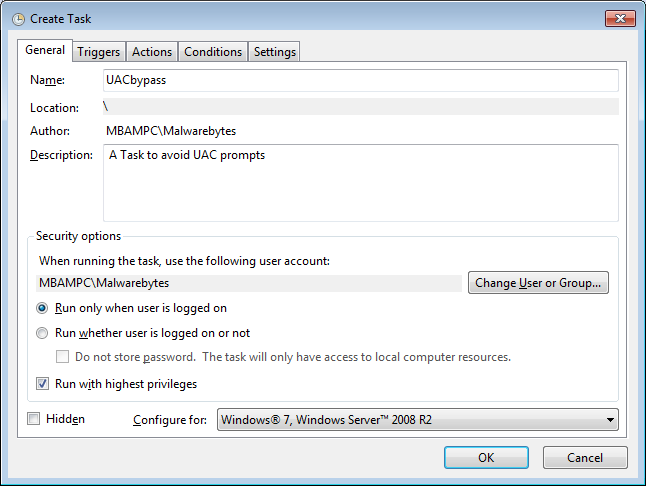
The “Hidden” checkbox can be used if the logged on user doesn’t need to be notified when the Task is run.
On the “Settings” tab you put a checkmark in the “Allow Task to be run on demand” checkbox.
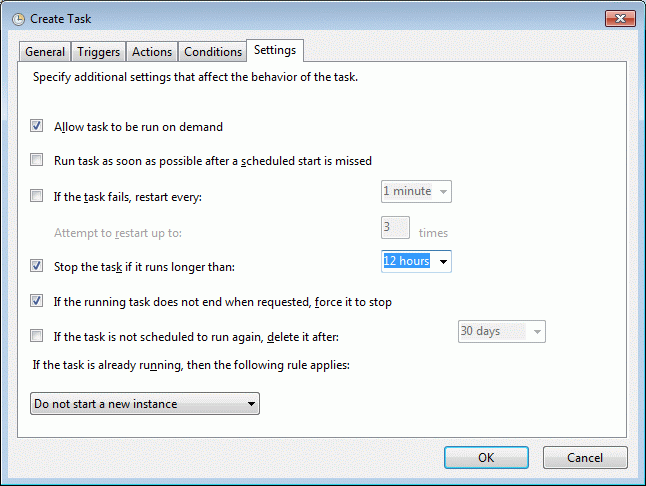
Depending on the nature of the task, you can choose to set the maximum time, that it is allowed to run, whether it can be forced to stop, and if you want it to run it, even if the program is already active.
On the “Actions” Tab you can choose which program to start.

Now you can start the program you selected by going to the “Task scheduler” as explained earlier. In the list of Tasks you should find the Task we created. You can right-click that Task and choose “Run”.
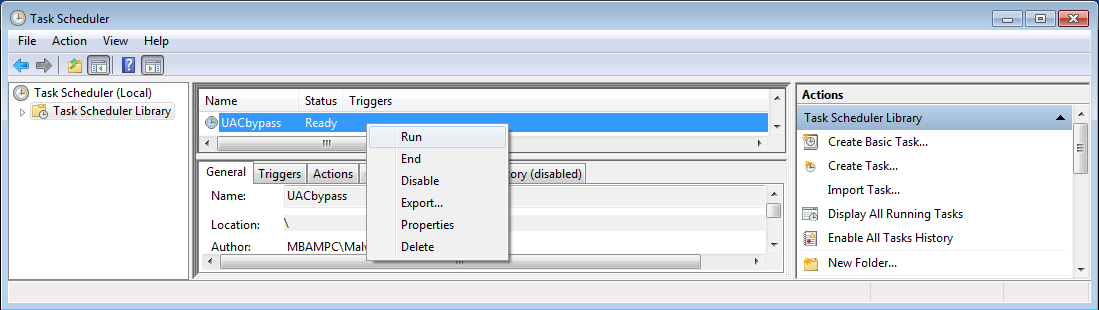
And behold the program will run without the normal UAC prompt!
Summary
The Task Scheduler is popular amongst adware pushers, because it allows them to run their software at regular intervals and without triggering the UAC prompts. This article shows you how to delete unwanted Tasks and demonstrates how to bypass the UAC.